Friday, March 29, 2024

Hotshot Tales, Part 3: A Marathon Track?

Hotshot Tales, Part 3: A Marathon Track?

Having player Hotshot Racing to 100% completion, I started revisiting the track layouts and noticed something unique to the Coast track set. Specifically, it should be theoretically possible to combine sections from all four tracks to create a gigantic supertrack that didn't intersect with itself. So without further ado, here's how it would be like.

The start/finish line would be on the same location (and facing in the same direction) as it would be for Sea View, the fourth track in the Coast environment (although as an alternative, it could instead share its location with The Marina or Ocean World, with the latter's starting grid facing in the opposite direction to that of the former). However, after the first turn, the track diverges onto the Ocean World route (the second track in the set) instead of going straight on, and continues to use much of that track's length before going straight on (instead of turning right) to take the final turn of The Marina (the first track in the set) in reverse. From there, it rejoins with Sea View's route all the way to the finish line. It might even be possible to extend this track even further by diverging one last time onto a reversed section of Heated Highway (the third track in the set), but since this track intersects with Sea View, this would change the final turn into a very tight 90-degree left-hander. However, given that most of the Desert tracks (and even some of the Jungle tracks) have at least one sharp 90-degree turn, this change would not be as difficult to implement as you might think.

Most of the corner sequences from this new mega-track would be familiar to those who have experienced its constituent tracks. However, the reversed hairpin would be unique, given that whereas it's a right-hander with a downhill exit in The Marina, it would now be a left-hander with an uphill approach. You'd still be likely to enter it at a high speed, though, making heavy braking a necessity. Moreover, the approach to the next turn (which leads back to Sea View) will be faster, and hence more challenging, although the left/right sequence that follows would remain as-is. Finally, if the section from Heated Highway is added to the lap, instead of a simple right-hand hairpin, there will be a 90-degree left feeding almost directly into a second hairpin turn, this time to the right. The resulting corner sequence would again require quick direction changes, and lead to the last long straight before the final corner. Speaking of which, it should be treated as a mirror image of the fourth turn (the one immediately before the double-apex hairpin) on the Downtown layout of the Desert track: slam on the brakes, steer hard towards the left, then straighten out quickly. However, this new 90-degree turn leads to a straight instead of a hairpin, so boosting away from the apex is a lot safer as long as you keep the revs up.

Here's how it would feel like. Starting in the same place as Sea View, you turn left at the first fork instead of going straight on...


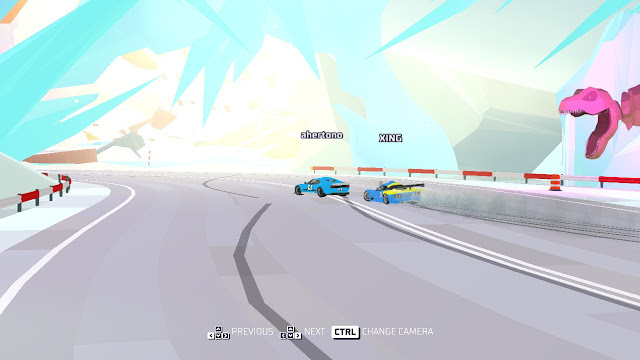
Above, from top: How the first few corners at a hypothetical Coast mega-track would look like - the fast right-hander at the start of Sea View, followed by a left-right chicane onto Ocean World's layout.

...before heading left instead of right at the start of Ocean World's lap.


Above: Approaching the start/finish line at Ocean World. The mega-track would not head right, but instead continue straight onto the final turn at The Marina... Below: which would be an uphill left-hand hairpin instead of the downhill right-hand hairpin shown here (essentially the next turn in reverse).


Head straight on for a while, then turn right to rejoin Sea View, before turning left again onto the first part of Heated Highway.


Above: This is the fork that leads to Sea View - my proposed mega-track would turn left instead of right.

The left-right sequence leads to one more long "straight", followed by a fast right-hander before the final turn...


Above, from top: Imagine these sections of track taken in reverse order and direction - this would be the final part of my hypothetical Coast mega-track.

...a tight 90-degree left that's a mirror-image of the fourth turn at Desert's Downtown layout that leads back to Sea View to finish the lap.


Above: This is where the last corner of my proposed mega-track on the Coast map would be.

This leaves one last question: Where do you place the checkpoints (which mark the end of the current sector and the start of the next one)? I'd suggest placing the first one in the same place as the second checkpoint at Ocean World (which is just after leaving the aquarium), and the second one just after the right-hand turn that leads back to Sea View.

In short, it's unlikely that Lucky Mountain Games or Sumo Digital (the developers of this game) will ever introduce such a long track to Hotshot Racing in the future, considering that they wanted all of their track layouts to be relatively short and sweet (in keeping with the old-school arcade nature of the game), but it's nice to know that they could have done so without compromising what makes this game so special.

Sunday, March 24, 2024

A Lifer's Diary, Part 14: Another Semi-Enhanced Game?

A Lifer's Diary, Part 14: Another Semi-Enhanced Game?


Having come up with a suggestion for a "semi-enhanced" rule set for my Spinner Wheel set based on Generation II of the Game of Life, I  now feel confident enough to do the same for Generation III. Here's how I'd do it.

General

The rule set will be based on the original "Classic" version, but it will also incorporate some aspects from the Enhanced Play option available in the 2008 video game adaptation. Further details are provided below.

Share the Wealth and Special Effect Cards

These will be retained as-is; however, in addition to receiving a Share The Wealth Card when landing on a Share the Wealth space, players must also draw a Special Effect Card that takes effect immediately. They will be simulated by a single spin of the movement wheel (1-10) as follows:
  • 1: Lose the Debt - Decrease your debt by $25,000.
  • 2: Give the Debt - Increase any opponent's debt (including interest) by $25,000.
  • 3: Shared Memories - Take a Life Tile from any opponent, if possible.
  • 4: Job Exchange - You may trade your current Career Card (regardless of its type) with any opponent, if possible; however, if you choose to trade Careers with another player, both players must lose all of their previously accumulated Pay Raises and return them to the bank.
  • 5: House Exchange - You may trade your Starter Home/House with an opponent, if possible.
  • 6: Free Pay Raise - Take a Pay Raise from an opponent, if possible.
  • 7: Lucky Spin x2 - Starts a Spin to Win in which you may select two numbers, but all other players may only choose one each, regardless of whether or not they currently have any Spin to Win Share the Wealth Cards of any types.
  • 8: Lucky Spin x4 - As above, but you may choose from four numbers instead of two.
  • 9: Half Salary Bonus - Receive 50% of your current salary from the bank.
  • 10: Spin Again - Self explanatory. Spin again until a number less than 10 is spun.
Some of these options were not present in the video game adaptation, but I added them anyway to spice things up further.

Wedding Gifts

I could use either leave it unchanged from the Classic Mode ruleset, or use the Generation II Enhanced Game rules regarding wedding gift amounts, which are as follows depending on the number spun:

  • 1-2: $0
  • 3-4: $5,000
  • 5-6: $10,000
  • 7-8: $15,000
  • 9-10: $20,000
Baby Gifts

These would remain unchanged from the Classic Mode ruleset for Generation III, with one exception: any player who adds twins to their family would receive $10,000 from every other player, instead of the usual $5,000.

College Career Choice

Unlike in the video game, this aspect will not be randomized; instead, I will use the Classic Mode rules for College Career Choice, both for the start of a game (for players who chose to go to college at the start) and when changing careers after returning to school.

Special Abilities

Although I have already mentioned these in an earlier post in this series, I'll explain them again, just to remind ourselves of how they would work:
  • Salesperson: Receive 25% of the price of any Starter Home or House purchased by another player.
  • Mechanic: Receive $10,000 whenever you overtake (or are overtaken by) another player. If one of your opponents overtakes another, collect $10,000 each from both of them.
  • Hair Stylist: Whenever an opponent adds a child, spin to determine the baby gift you receive from them. The amount earned is the same as for wedding gifts in the Classic Mode rule set ($0 for 4 or below, $5,000 for 5 through 7, and $10,000 for 8 and above).
  • Police Officer: Collect $5,000 from any opponent who spins a 10.
  • Entertainer: Receive a Pay Raise when two identical numbers greater than 7 (i.e., 8, 9, or 10) are spun on consecutive turns.
  • Athlete: Receive two Pay Raises (instead of one) when passing over or landing on a Pay Raise space. In addition, retaining this Career after returning to school will earn three Pay Raises instead of two.
  • Teacher: Does not have to pay for children's tuition fees (i.e., any Pay space in which the payment's size is solely dependent on the number of children belonging to the player who landed on it), or for returning to school.
  • Computer Designer: Allows the player to select one additional number during Spin to Win (except during the Lucky Spin special effect).
  • Accountant: Cannot pay taxes or receive a tax refund, but will collect $10,000 from the bank when any opponent pays taxes.
  • Veterinarian: Receive a Life Tile when landing or passing a Pay Raise space, taking from an opponent if necessary (unless, for whatever reason, there are no other players to take Life Tiles from).
  • Lawyer: Gains $50,000 more and loses $50,000 less from Lawsuits. In addition, if one opponent successfully sues another, that player must also pay the Lawyer $10,000.
  • Doctor: Exempt from any and all medical expenses. Note that this only takes effect if a Doctor lands on any one of several spaces on the board, and any opponent who lands on any of these spaces must pay the Doctor instead of the bank (unless no player has that Career Card).
Starter Home and House Values

All Starter Homes and Houses must now have a resale value 25% greater than their original purchase price; however, they will no longer be chosen at random when someone purchases them.

Lawsuits

With the exception of the Lawyer's special ability mentioned above, Lawsuits will remain unchanged from the Classic Mode ruleset.

Career Choices

These will remain completely unchanged from the Classic Mode ruleset, right down to the ability to retain your current Career Card if none are available, at the expense of having to return all of your Pay Raises (if you still have any) to the bank.

Spin to Win

This will generally follow the rules used in Classic Mode, with the only changes being those that I have mentioned above.

Pay Raises

Again, this mechanic will be almost identical to what it was in Classic Mode (except for the Athlete's special ability), for simplicity's sake. However, there will now be provision for an additional rule in which any player who lands exactly on a Pay Day space (as opposed to simply passing over it) will receive an additional Pay Raise. This bonus may also stack with the Athlete's special ability, if it is implemented.

Conclusion

Among the changes I would make to the Generation III Game of Life ruleset, the ones listed above are the most significant. I could implement additional rules if I wanted to, but for now, this is as much meddling that I could get away with before it starts to become too unwieldy for my Generation III Spinner Wheel set.

Saturday, March 23, 2024

A Lifer's Diary, Part 13: A Semi-Enhanced Game?

 A Lifer's Diary, Part 13: A Semi-Enhanced Game?

Having played the 1998 Game of Life video game adaptation (based on Generation II) countless times in both Classic and Enhanced formats, I have been thinking of ways to adapt the latter to accommodate the limitations of the Spinner Wheel set I have used for simulating a Generation II Game of Life. Here's how I could do it.

Revenge

This would remain unchanged from the video game. If you land exactly on (as opposed to passing over) a Pay Day space, you must take your salary from any player who has not retired at Countryside Acres. However, if all other players have retired there, you must instead take your salary from the bank.

Wedding and Baby Gifts

Whereas in the video game, you will receive $1,000 multiplied by the number spun from every other player, I'd propose this system instead:

  • 1 or 2: $0
  • 3 or 4: $5,000
  • 5 or 6: $10,000
  • 7 or 8: $15,000
  • 9 or 10: $20,000
This will further incentivize spinning higher numbers when attempting to earn wedding and baby gifts. Of course, if you added twins to your family, you'd have to spin twice (once per child) instead of just once.

House Purchase and Resale Prices

These would remain mostly unchanged, but a player who spins a 1 when purchasing a house (i.e. an Inheritance) would receive the same amount of money as they would pay for it under the Classic rule set once the game has ended. The cost of insurance would remain unchanged, however. Therefore, a House Inheritance is more profitable in the long run than buying the house at 50$, 100%, or 150% of its default value, depending on the number spun immediately after a house has been chosen for purchase.

Life's Little Games

It would be impossible to implement these with the Spinner Wheel's current configuration; instead, I will revert to using the Classic rule set's Life Tile system. This would make it impossible to get Revenge on another player by any means other than landing on a Pay Day space (see above), but I can accept that.

Retirement Gifts

As with the Revenge system, this would also remain unchanged from the video game.

Extra Players

This could apply to both the Classic and Enhanced rule sets, but I may increase the player limit to 8 if I feel like it. It would, however, lengthen the game (in addition to potentially causing a Career Card shortage), so I don't have to implement this rule.

Conclusion

These are some of the changes I'd have to make to ensure that a (semi-)Enhanced Game could be workable with my Generation II Game of Life Spinner Wheel set. In the next post, I'll discuss what it would take to do the same with the Generation III set.

Thursday, March 21, 2024

A Lifer's Diary, Part 12: Setting Up the Next Simulated Game?

A Lifer's Diary, Part 12: Setting Up the Next Simulated Game?


After revisiting Spinner Wheels following several months of inactivity, I have realized that all my Spinner Wheel sets are in the exact same state as when I last visited them, i. e. no options or wheels have been added or removed. However, with the last simulated game being based on the standard Generation III rule set, I am thinking of using a different rule set instead of retaining it for the next game. Obviously, I can't switch to Generations, I, IV, or V, since I haven't made any spinner wheels to simulate them yet. That leaves Generation II as the only option if I want to change rule sets for my next simulated game, although I don't have to do so if I don't want to.

With that in mind, I have another choice to make as well. It could be that this simulated game could be the one in which I implement an Enhanced rule set. This would mean introducing special abilities for all Careers, regardless of type (in Generation III), or adopting some of the rules in the 1998 video game adaptation (in Generation II). In the latter case, I could even increase the player count to 8 instead of, or in addition to, using the "semi-enhanced" ruleset. Whatever rule set I end up choosing, however, I am sure the resulting game will be a one to remember - I will need some time to come up with a suitable choice, but I promise you it will be worth my while if I go through with it.

Saturday, March 16, 2024

Confessions of an Automationeer, Part 172: Toeing the Line

Confessions of an Automationeer, Part 172: Toeing The Line

In the previous post, I looked back on QFC41 and how it began and concluded. In retrospect, that challenge taught me an extremely important lesson: toe-in angle adjustments (added in the Ellisbury update for Automation) are just as important to a good suspension tune as other suspension settings (camber angles, spring/damper rates, and sway bar stiffness) have always been. With that in mind, here's a brief explanation.

To adjust your car's toe-in angle, open the suspension tab (third from the left on the bar at the bottom of the screen) in the trim section of the car designer. There, you'll find the toe-in angle settings on the second row of the suspension tuning panel. In general, increasing the toe-in angle at either end will make the car more stable by inducing understeer, while decreasing toe-in angle at either end (or even reducing it to a negative value, which is described as toe-out) will make it more responsive by causing oversteer. With the basics dealt with, I'll now show you a few examples.

First up is the suspension tune for a front-engined, rear-wheel drive sports coupe. With its engine mounted as far aft as possible, it has a natural tendency to oversteer, and as such, I gave both axles a positive toe-in angle to improve drivability.


Above: In a rear-wheel-drive car, increased toe-in angle (up to a point) can be helpful in maintaining stability.

Next is the suspension tune for a front-wheel-drive hatchback. Due to its inherent tendency to understeer, I had to dial it out with a small amount of negative toe-in angle (effectively slight toe-out), thus making it feel more nimble in the corners.


Above: The suspension tune for a front-wheel-drive car should have some negative toe-in to counteract any understeering tendencies.

In general, camber and toe angles should be set to ensure a drivability rating of 100% (as shown on the low-speed steering graph), to avoid an unnecessary bias towards excessive over- or understeer. However, older cars may have a lower maximum drivability threshold, above which they begin to exhibit these undesirable tendencies; to find the exact value, you should open the high-speed steering graph (the third button from the left in the second panel on the suspension settings screen), and adjust toe angles accordingly, without generating any over/understeer warnings.

In short, toe angle is an important element of car setups in Automation, and one that us Automationeers are glad to be able to adjust ever since the Ellisbury update introduced the ability to do so.


Wednesday, March 13, 2024

Hotshot Tales, Part 2: Winning by Less Than a Millisecond

Hotshot Tales, Part 2: Winning by Less Than a Millisecond

Having spent countless hours playing Hotshot Racing, I've never won (or lost) a race by a millisecond or less - until very recently, that is. Now, before I start, I'd like to inform you that although it's theoretically possible for this to occur in both singleplayer and multiplayer, it's actually extremely rare in practice, and fittingly, there are no trophies/achievements for doing so. Yet that's exactly what happened on a 7-lap race in Arcade Mode on Frozen Freeway, the fourth and final track added in the Boss Level DLC. So here's how I did it.

For this particular race, I chose Marcus' Drift-class car, the Mongoose - a machine built to enter, maintain, and exit drifts easily without losing control or speed in the process. On a twisty track such as Frozen Freeway, this is generally a boon, given that the track's layout consists of many tight corners in quick succession. I also opted for the default automatic transmission option due to my lack of experience with the manual setting. So here's how the race went.

I got a boost start at the beginning, as usual, and led the field into the first turn. However, by the time I got to Turn 7 (the first turn after the tunnel), I had lost so much speed through drifting that I lost several places. Nevertheless, I had built up enough boost for more than one charge - enough to recover all the lost ground, and then some.


Above, from top: The early stages of this race were characterized with an intense four-way battle for the lead - and I was in the thick of it.

After the first few laps, it became clear that Xing (who was driving the Fastback in this particular race) was my fiercest rival. From that point on, he and I traded places on several occasions, despite my best efforts to pull away from him.


Above, from top: Xing and I fought tooth and nail for the lead, but with just a few laps to go, Alexa managed to reach the top 3, in the hopes of playing spoiler.

The very last lap turned out to be the most hectic of all. Trailing Xing by mere tenths, I gave it everything I got, and held the lead out of the last turn, only for Xing to accelerate as fast as he could. It wasn't enough, though, and I crossed the finish line feeling somewhat drained, but most of all, relieved and triumphant, after the timing screen showed me as finishing first, ahead of Xing, by less than a millisecond - in fact, the margin of victory was so small, Xing and I were credited with the same total time, with Alexa just 0.030 seconds behind.


Above, from top: The closest possible winning margin in Hotshot Racing is less than one millisecond - too small to show up on the post-race timing screen.

So far, I've only pulled off this feat exactly once - and to finish any race in first or second by less than a millisecond in Hotshot Racing is such a nerve-racking experience, you'll wonder what's going through the minds of each the game's characters if they find themselves in such a situation. Increasing the timing accuracy to tenths of milliseconds, however, is something best left for developers of highly realistic racing simulators, and as such, would be low on the priorities for development of Hotshot Racing 2, if it ever gets made at all.

Monday, March 11, 2024

Confessions of an Automationeer, Part 171: A Sporting Crisis?

Confessions of an Automationeer, Part 171: A Sporting Crisis?

Recently, I had yet another chance to host a competition on the Automation forums. This time, I was given the reins to QFC41, having placed fourth in the previous QFC, only for the top three entrants to decline hosting duties for the next one. This time, I decided to combine the theme of the first QFC (small, light, affordable sports cars) with the time period of the second (mid-1970s). After a few adjustments to the rule set, I started the round on time and on schedule. It did not take me very long to receive entries, and by the time the deadline for submission had passed, I had received a total of 27 entries, although one of them was ineligible for not meeting the minimum fuel economy requirement (which was set to 20 US mpg for this round). That left a total of 26 entries that were eligible for consideration.

During judging, many of them fell short in one way or another, but eventually, I came up with a shortlist of ten cars to examine further. I went through each of those with a fine-tooth comb, and eventually narrowed my choice down to three: the Oran S1600 (a small, red, wedge-shaped coupe), the Phenix Helios (a larger wedge-shaped car, but mid-engined and with a bright yellow exterior), and the Tarske CF408 Coupe (another red front-engined car, but larger and more curvaceous). First to go was the Oran, whose overreliance on high-end and/or advanced technology was antithetical to the mission statement of the round. The Helios (which shared its name with another entrant in this round, although that one did not make it anywhere near the top 10) finished second by virtue of being one of the best-performing cars left, without being too encumbered by excessive standard equipment. However, it lagged behind in drivability, which meant that the Tarske (whose engine had more power and torque than that of any other car in the top 3) took top honors this time around.


Above, from left: The top three entries in QFC41, which I hosted - Phenix Helios (the runner-up), Tarske CF408 Coupe (overall winner), and Oran S1600 (third place).

All in all, hosting QFC41 was one of my most memorable and enjoyable experiences as an Automationeer, with the end result being a worthy winner and plenty of plaudits for the highest-placed entries. I'll see you next time - I'm compiling a spreadsheet of every QFC41 entrant's stats right now.

Sunday, March 10, 2024

Infinite Space Playthroughs: The Lone Wolf Challenge

Infinite Space Playthroughs: The Lone Wolf Challenge

Having set a new personal best for the highest score in Infinite Space III: Sea Of Stars, I decided to embark on another challenge: Is it really possible to fully complete the game, quest and all, without ever adding any capital ships to your fleet? The answer is, surprisingly, yes, and for this reason, I call this the Lone Wolf Challenge. There are a few caveats to this, though. For this to occur, you must overwrite every star system where you can add a capital ship to your fleet, thus removing both the systems and the ships from the map, and this is only possible with the use of a Limited Vacuum Collapser; in fact, you may need two such detonations to accomplish this if the systems containing the capital ships are too far apart to remove with just one blast, which also explains why, on many occasions, it's actually impossible to pull this off.

However, on this particular playthrough, I got lucky. Occasionally, only two capital ship allies will spawn on the map instead of the usual three, and this time, those allies spawned on systems that were close enough to each other, to the point that a single vacuum collapse would purge them from the map, unless I hired them first. Instead, as soon as I pinpointed the location of one of them, I decided to annihilate them both. Normally, this would be a bad idea, especially since I hadn't traded in my starting capital ship for something larger (and in fact, never did), but by then, I had upgraded said ship to the point where it was, for all practical purposes, a fleet unto itself.


This is the state of the map after the vacuum collapse. There were originally two star systems to the left of Karn, the Zorg home system - one was green and the other bluish-white. These were where the only two capital ship allies (one Terran, the other Garthan) could be found) on this particular map; however, I overwrote both star systems with a single vacuum collapse, without adding either capital ship to my flotilla, and in doing so, prevented myself from acquiring any allied capital ships for the rest of this playthrough.

With both allies gone from the map before I could even hire them, I only had a Terran corvette and two fighters (one each from the Zorg and Muktians) in my fleet. Given that the former was now the only capital ship in my fleet, this made upgrading it even more of a priority. To that end, I retrofitted it with a Nova Cannon (which I created from a Timeless Bauble), Tachyon Ray Gun, Temporal Flux Shield, Multibot Repair Drone, Quantum Corkscrew Thruster, Ion Flux Warp Drive, Hyperwave Filter Array, Plasma Coil Cloaker, and Sardion Optimizer (the last two of which I purchased from the Urluquai at 5 coins each).


The sole capital ship in my fleet during this playthrough after being fully upgraded.

Such was the effectiveness of the equipment I had installed that my lone capital ship was capable of taking on a Yellow Kawangi Dreadnought - and winning, as long as it was micromanaged correctly. Granted, any ship with a similar equipment setup (as long as it had a Nova Cannon and Plasma Coil Cloaker) could pull off this feat), but the fact that I was using my starting ship for such a task, and without even the slightest theoretical possibility of summoning any other capital ships from my own fleet, made it even sweeter.


Taking out a Kawangi Dreadnought with any ship smaller than a frigate is a remarkable achievement, especially when you don't have any reinforcements at all to deploy if you come under fire.

In fact, I was able to complete the Yellow Kawangi quest four times during this playthrough. This was made possible by the fact that the Limited Vacuum Collapser (which I used to overwrite the Terran and Garthan capital ship allies later on) was placed very close to the first star system that the Kawangi would visit at the start of the quest. And since the bug that allows Kawangi dreadnoughts to spawn on the map after the first one has been destroyed remains unpatched, I decided to exploit it as often as I could before reaching the time limit. By the end of the game, I had destroyed four Kawangi dreadnoughts, each on a separate occasion before any of them had managed to leave (and immediately destroy) the first system they visited.


The debriefing screen showed what was an extremely small fleet on paper, but one that turned out to be much more powerful than its basic composition suggested. In fact, with the right equipment choices, your starting ship can be effective enough to fully complete the game (on any difficulty) - and this particular playthrough was no exception.

In short, the Lone Wolf challenge in Sea of Stars is, in fact, theoretically possible to complete, but only under an extremely rare set of circumstances. However, that's exactly what happened this time around, and with the loadout my lone capital ship was using, I could still have fully completed the game even if the NPC fleet strength had been set to a higher level. Even so, it is generally inadvisable to attempt to complete a game with only one capital ship in your entire fleet, especially on higher difficulties.