Sunday, July 27, 2025

Confessions of an Automationeer, Part 213: A Pretty Pony

Confessions of an Automationeer, Part 213: A Pretty Pony

It's taken a while for me to create a fully detailed build based on the '67 Cockatrice mod body set, but I finally did it with the 1967 WM Wight 5.0 Sprint. Using the fastback version as the basis, I ended up creating something that had a more refined, yet sporty look.


Above, from top: The 1967 WM Wight 5.0 Sprint may have a more refined and elegant look compared to its contemporaries, but it's still a potent performer underneath its sleek outer skin.

Built on a ladder frame with a coil-sprung live rear axle at the rear and control-arm front suspension, the Wight's 5.0-liter V8 breathes through a single 4-barrel carburetor and delivers a solid 220 net horsepower to the rear wheels via a close-ratio 4-speed manual gearbox and a clutched limited-slip differential - good for a 0-60mph time in 6.2 seconds and a quarter-mile time in the low 14-second range. But with all-around disc brakes (an optional extra on this trim level) and a sportier suspension tune, the Sprint is also more than capable of keeping up in the corners. And with a premium 2+2 interior and AM radio (an 8-Track player would become optional later on), the occupants would not be too uncomfortable sitting inside either.


Above: This may be my first attempt at making a fully detailed interior on anything with this specific body set, but it's a start - and it captures the premium ambiance well enough.

In short, it may my first try at making a fully detailed muscle/pony car build from the '60s or '70s, but the Wight was definitely vindication of my plan. I even entered it in a Discourse challenge, which you can find here.

Saturday, July 19, 2025

Hotshot Tales, Part 15: A Rare Triple Hit

Hotshot Tales, Part 15: A Rare Triple Hit

Barrel Barrage mode in Hotshot Racing allows you to hit multiple opponents with the same barrel if they are close enough to each other when one of them hits that barrel, and if all of them have 20 health points or less, you can get a rare simultaneous multi-kill. Usually, this kind of combo hit is limited to two opponents, but it's also possible, though much rarer, to hit three of them at once. Here's a recent example from a particularly crazy session.


Above, from top: A rare example of a triple hit (captured from various angles) during a Barrel Barrage in Hotshot Racing, on the first lap of a 7-lap slugfest on Heated Highway.

My first Barrel Barrage triple hit came after nearly an hour of trying, on Heated Highway (generally one of the most difficult tracks due to its narrow roads, short straights, and tight corners) - and after many fruitless attempts, I finally got it near the end of the first lap, with a direct hit to Xing's Sentinel, and Keiko's Super F-90 and Viktor's Blade also taking collateral damage due to both of them being close enough to the barrel when it detonated. I went on to win that race easily after every single opponent was eliminated due to excessive damage from barrel collisions, but getting the triple hit was a victory in itself.

In short, getting a triple hit in a Barrel Barrage is very difficult (and hence rare), especially in multiplayer, but whenever it occurs, you should always celebrate the occasion.

A Lifer's Diary, Part 17: Revenge over Lawsuits - Which One's Better?

A Lifer's Diary, Part 17: Revenge over Lawsuits - Which One's Better?

Within The Game of Life, the concept of collecting money directly from an opponent by landing on a certain space (as opposed to having an opponent land on a space of a specific type) is not new, having first debuted with the Revenge mechanic in Generation I. It worked by collecting your salary from an opponent when you landed on a Pay Day space, but was strangely absent from Generation II (except in its video game adaptation, and even then, only in Enhanced Mode, where it could not be used against anyone who retired at Countryside Acres), only to be reintroduced in Generation III via the Lawsuit mechanic. This time, you had to land on a blue Lawsuit space to sue an opponent; however, whoever you sued won't have to pay you anything at all if they give you an Exemption Card. 

In Generation IV, Lawsuits returned, but only as part of two specific Action Cards; instead, they linked the Long-Term Investment numbers to the various Career Cards, and reworked them so that the player  holding that particular card would collect cash whenever anyone (including themselves) spun its number. Finally, in Generation V, there are once again Lawsuit spaces, but there are fewer of them, although investments must once again be bought manually, and are therefore no longer tied to careers (except in the spin-off video game adaptation, The Game of Life 2, which uses a different rule set).

While I liked the Revenge mechanic from Generations I and II, the logic behind it was flawed; it was most effective if your salary was high enough (although this raised the problem of players with such high salaries getting too far ahead if they got really lucky). On the other hand, if your salary was too low, you wouldn't be able to hinder your opponents as much as you hoped you would (even if you landed on Pay Day spaces often enough). It was for this reason that the standard ruleset for Generation II lacked this feature; unsurprisingly, later generations also forewent Revenge in favor of other means of disrupting opponents' progress as stated above.

On the other hand, I found the Lawsuit system in Generation III to be far more balanced. With only 8 Lawsuit spaces on the entire board, you can now only earn up to $800,000 from Lawsuits (assuming all of them are successful, and you also take the Risky Path where the penultimate Lawsuit space is found), but you are guaranteed to collect $100,000 for every successful lawsuit. In later generations, they are less lucrative, and the fact that you can now actually gain more money from your opponents through you investment number complicates matters even further.

So while the idea of reintroducing Revenge (by collecting your salary directly from any opponent who has not yet retired at Countryside Acres) through landing exactly on a Pay Day space is tempting, it's not as good an idea as you'd think. However, the Lawsuit system was never better implemented than in its debut for Generation III, and I'd like to see Generation VI revert to those original Lawsuit rules, even though they were still quite good in Generations IV and V. In short, Lawsuits are more useful in the Game of Life compared to revenge because although you get fewer chances to use them, you'll get the same amount of money from them every time you do so.

Monday, July 14, 2025

Infinite Space Insights: Preventing a Yellow Kawangi Invasion?

Infinite Space Insights: Preventing a Yellow Kawangi Invasion?

With Infinite Space III: Sea of Stars handling the Yellow Kawangi Invasion quest differently compared to earlier games, and even removing the unique item flag on specific items for good measure, you may be surprised to find out that these changes make it possible to prevent the Yellow Kawangi Invasion quest from starting at all. Here's how you can do it.
  1. Make sure the map does not fulfill any of the requirements for the other four quests (Ravian Invasion, Urluquai Crusade, Primordius, or Swamp Pirate Rebellion). In that case, the Yellow Kawangi Invasion will be the only quest that can be triggered.
  2. If the above requirement is met, play normally and explore every star system on the map except for the one where the Limited Vacuum Collapser can be found. Be warned that visiting that particular system will start the quest, and you'll never know what you'll find in a system .
  3. Ensure that you have a Timeless Bauble in your cargo bay. This item can be activated and converted to any other item by typing its exact name.
  4. Create a second Limited Vacuum Collapser (which is no longer a unique item in Sea of Stars, and hence can be created even if one already exists on the map) from the Timeless Bauble.
  5. Make sure there is at least one star system within five light-years of the first Collapser. 
  6. If such a system exists, move your fleet to that system, then activate the second Collapser (the one currently in your possession), making sure to set the fuse timer to a value that allows your fleet to escape from the blast radius before detonation.
  7. Once you've reached a safe distance, stand back and watch the fireworks. The moment the star system containing the first Collapser is overwritten, the Yellow Kawangi Dreadnought will not spawn on the map at all.
Obviously, you will not be able to pull this off this trick if you are unable to perform any of the steps above. But if you can do it, you'll spare yourself a lot of hassle in dealing with a Yellow Kawangi Dreadnought, regardless of whether or not you do so in direct combat.


Above, from top: This Sea of Stars playthrough was unusual in that I was able to prevent a Yellow Kawangi invasion before it even began - by creating a second Limited Vacuum Collapser using a Timeless Bauble, followed by detonating the second Collapser within five light-years of the system containing the first Collapser (which would've triggered the quest if discovered) before I'd even visited it, thus overwriting that particular system and preventing the Yellow Kawangi from arriving at all.

In short, it takes a lot of luck (and a little bit of skill) to pre-emptively prevent a Yellow Kawangi incursion before their Dreadnought enters the sector map, but it's theoretically possible. Just don't expect to gain 5000 extra credits (which can only be acquired by destroying the Dreadnought after it has appeared, before it annihilates your home system of Glory) if you pull it off, though.

Friday, July 11, 2025

Confessions of an Automationeer, Part 212: Pocket Dimensions

Confessions of an Automationeer, Part 212: Pocket Dimensions

I've extolled the virtues of small, light cars multiple times in this series, and I recently decided to create another: the 1992 EMR EX8L. A reimagining of an earlier design, this small roadster is built on the '92 Evade body set (2.27m wheelbase) in 2-door soft-top convertible configuration. However, unlike its predecessor, it utilizes a glued aluminum chassis with aluminum alloy bodywork (made possible with +8 tech pool in chassis options), and the entire engine has a lightweight aluminum-silicon block/head combo. In addition, with long-tube headers, individual throttle bodies, and lightweight forged internals, it develops a solid 350 horsepower, sent to the rear wheels via a close-ratio 5-speed manual gearbox and helical limited-slip differential.


Above, from top: The EMR EX8L is what its predecessor would've been without the requirement to conform to challenge regulations, being built on a new, smaller body set and with lighter materials to exploit its extra power.

Still with a premium interior and CD/cassette stereo sound system as standard, the EX8L can reach 60 mph from a standstill in just 4.5 seconds, but its all-alloy platform reduces its weight to just 1,015 kilograms, hence the rapid acceleration and agile handling. Having square-fitment 16-inch forged wheels and 225/50R16 high-performance tires also helps, as does omitting power steering. In a car less than 4 meters long, such simplicity results in a highly visceral experience, even for its time.


Above, from top: Don't be fooled by its relatively plush interior - the EMR EX8L is a raw, unhinged animal with the heart of a beast squeezed into its small, light frame.

In parallel with developing the EX8L, I revised the HPG H2L I'd described earlier in this series. By reducing wheel diameter by 1 inch on each axle, among other changes, it resulted in a handy 5kg weight reduction, and I also increased the ride height by 15mm to avoid bottoming out with the front and rear downforce levels at their maximum settings. It is indeed an even more cohesive build than before, especially with the instrument panel now being comprised of several separate displays.


Above, from top: In revising the HPG H2L I'd made earlier, I managed to make it look and feel even more period-accurate without sacrificing any of its analog, lightweight ethos.

In short, although there will always be a place for larger, heavier Automation builds on my disk drive, I will never forget that sometimes, the most satisfying cars to build turn out to be the lightest ones.

Friday, July 4, 2025

Hotshot Tales, Part 14: The Case for a Custom GP

Hotshot Tales, Part 14: The Case for a Custom GP

Hotshot Racing shipped with just four series of races in Grand Prix mode (The Tour, Pro Circuit, Racing Elite, and Hotshot!), with a fifth (Boss Level) being added in the Big Boss DLC update. Each one is available in all three speed classes (Normal, Hard, and Expert), so in reality there are 15 variants in total. However, if you want to complete the game fully, you'll need to win at least one GP with all 32 vehicles, and doing so unlocks additional customization items. There are also achievements/trophies for winning a Grand Prix overall with a specific character - and there are eight of them (one per character). So there's a lot of replay value in Grand Prix mode.

But what happens when you've done all of that, and also unlocked and purchased every single customization option? You could enter some online or local multiplayer races, and try some custom single-player events on Expert over 7 laps (the maximum possible race distance) to really challenge yourself, but even then, your options are still limited. So I'm proposing an additional game mode: Custom GP. This variation of the regular GP mode is not something you find in most racing games, but feels perfectly appropriate here.

You'll need to unlock it by winning every GP in every speed class, but when you do, you finally have a chance to create your own series of races. And unlike the races in the standard GP series, which are always three laps long (except for the Boss Level GP races, which last four laps instead), you can change the location, speed class, and number of laps for each race individually. In addition, you can select how long the GP will be, from 3 to 10 races. Finally, it should be possible to use the same track more than once in the same custom GP, and change cars between races (while also using the same character for the entire GP).

The advantages of introducing such a mode are obvious. In addition to adding some welcome extra variety to the game, it forces you to change your strategy much more often if you're using different cars from the same character over the course of the season. There's also potential for the Custom GP mode (along with the regular GP) to be carried over to multiplayer - but that functionality should be available from the outset for multiplayer as well. In any case, you'll have even more reason to revisit Hotshot Racing with this mode.

You could even take the idea further by having some of these races use the Barrel Barrage or Drive or Explode event formats. However, to make these changes viable, I would suggest having the last surviving player automatically win the race if all other players have been eliminated - a change that could also be applied to Arcade Mode events under those formats with a single change in the Options menu.

In short, a Custom GP mode for Hotshot Racing (at least in the way I'm proposing it) wouldn't just increase the game's already great replay value even more, but give the player a chance to try out different vehicles from the same team and find out which one works best for each race, thus yielding a more adaptable approach during the season.

Wednesday, July 2, 2025

Infinite Space Insights: One Pair is Enough?

Infinite Space Insights: One Pair is Enough?

A recent playthrough of Infinite Space III: Sea of Stars ended in one of the weirdest ways possible, when a supernova shock wave engulfed the capital ship Kestrel (which would cause Pirate fleets to spawn at three different systems had I boarded it) before I could add it to my flotilla. However, I decided the risk associated with capturing the Kestrel would not be worth it this time around: if the Kestrel spawns at the start of a regular game, and it is destroyed before the player attempts to board it (by deploying any of their ships onto the battlefield), the Swamp Pirate Rebellion quest will not begin. 


Above: I didn't get the capital ship Kestrel (which would've triggered the Swamp Pirate Rebellion quest) in this playthrough - I deliberately ignored it (and in fact, didn't even attempt to board it) in favor of letting the supernova shock wave engulf it - but I was fine with that, considering that it made this particular playthrough attempt easier.

This saved me some time, hassle, and credits (the latter of which I would've otherwise spent on upgrading and rearming the Kestrel), but there was another capital ship in this playthrough that I could've added to my fleet, but didn't. That vessel, a Garthan Scout, was just as useful in combat as the Kestrel, but once again, I decided to save more credits by destroying it instead of adding it to my flotilla, and in fact I did so (with a well-placed Limited Vacuum Collapser detonation) before the Kestrel was wiped off the map in a supernova explosion.


Above, from top: A well-placed Limited Vacuum Collapser detonation overwrote the system in which I found a Garthan capital ship - but since I deliberately chose not to add it to my fleet before then, I missed out on the chance to do so. I didn't miss it all that much, however, considering that my existing capital ships could more than hold their own in combat.

That left me with just two capital ships in my flotilla: my starting ship (a Terran corvette) and a Zorg capital ship (which I'd upgraded, and later traded in for a Zorg corvette for more firepower). And that was it: aside from a pair of escorts (a Garthan fighter piloted by a mercenary, and a Muktian fighter flown by a noble pilot), I did not have any other ships in my flotilla by the end of the game. Even though I was attempting the playthrough on the lowest difficulty setting (minimal NPC fleet strength and nebular mass), I knew that having only two capital ships available for combat may not be enough unless I had acquired enough upgrades - fortunately, I had acquired a Multi-Missile Launcher to install on one of those vessels, and had I allowed the in-game clock to progress further, I could've purchased at least one more from the Muktian and Terran home systems, but I'd explored the entirety of the map before then, so I chose to end the game right away.

It could've been worse, though. As described in an earlier post, I managed to complete the game with just one capital ship in an earlier playthrough, though this is even rarer still. Then again, in most of my playthroughs, I'm content to fill all four capital ship slots in my fleet, which goes some way to maximizing your score with the chosen difficulty settings - and isn't that what you should be doing? Even so, completing a regular game after adding fewer than three capital ships to your fleet is quite an achievement, because it forces you to manage your fleet more carefully with fewer capital ships in it, especially on higher difficulties.

Tuesday, July 1, 2025

Hotshot Tales, Part 13: Sea View Slugfest

Hotshot Tales, Part 13: Sea View Slugfest

Remember when I scored six kills in a single Barrel Barrage race in Hotshot Racing, on the Downtown variant of the Desert map? Well, I did it again, but on the Sea View variant of the Coast map. This time, though, I came very close to scoring a seventh kill right at the very end, and in fact would've done so if the last opponent hadn't taken themselves out by driving straight into a barrel I hadn't placed.

The recipe for this rampage was simple: take the fastest car (Marcus' Carbon) on the longest race (7 laps), in the fastest speed class (Expert), and wreak as much havoc as possible until you get eliminated or finish the race (whichever comes first). Also be sure to avoid running out of time, and prioritize survival over speed where possible if you're the last player standing. And so, the challenge was on.

Right from the start, I jumped out to an early lead from the back, thanks to a perfect launch (which occurs when you keep the RPM in the yellow zone on the tachometer when the starting countdown ends). Just before the last turn of the second sector, I got my first hit (against Aston's Shadow), even though it meant hitting the outer wall. I quickly recovered to catch back up to the leaders, and on the next lap, hit Xing (in a Blaze) twice to eliminate him - my first kill of the match. And shortly before completing the second lap, I managed to get a double hit against Aston and Keiko at the same time (the latter of whom was driving an Eight Rock). 


Above, from top: It didn't take me very long to get my first kill in this match - and I even scored a rare double hit for good measure.

I scored no eliminations on the third lap, but got two of them a few seconds apart on the next one: Toshiro's Wild Line and Mike's Eagle. Both of them got taken out when each of them hit a barrel I'd placed earlier, to serve as a trap. And then Keiko bit the dust when she slammed into another barrel I'd left behind after completing the first sector. It was mostly quiet from then on, until Aston succumbed to the pressure and fell into yet another barrel trap I'd placed before the S-curve in the second sector - right before I commenced the seventh and last lap.


Above, from top: Three kills within just a few seconds on the fourth lap is quite impressive, especially since there was only one opponent challenging me for the lead by then - the other two kills were against rivals who had fallen very far behind.

The last lap left me with a crucial decision: Should I go for at least one kill, or simply cruise to an uncontested victory instead? Feeling brave, I went for the former, and quickly caught up to Viktor's Rennen - I took it out with one hit, after realizing that it had already been critically damaged from multiple previous barrel collisions. I then set my sights on Alexa's Mirage, only for it to disappear when it, too, drove right into a barrel before it could start its last lap of this race. So it wasn't the total wipeout I'd been expecting, but 6 kills in a single Barrel Barrage is still an amazing showing by any standard.


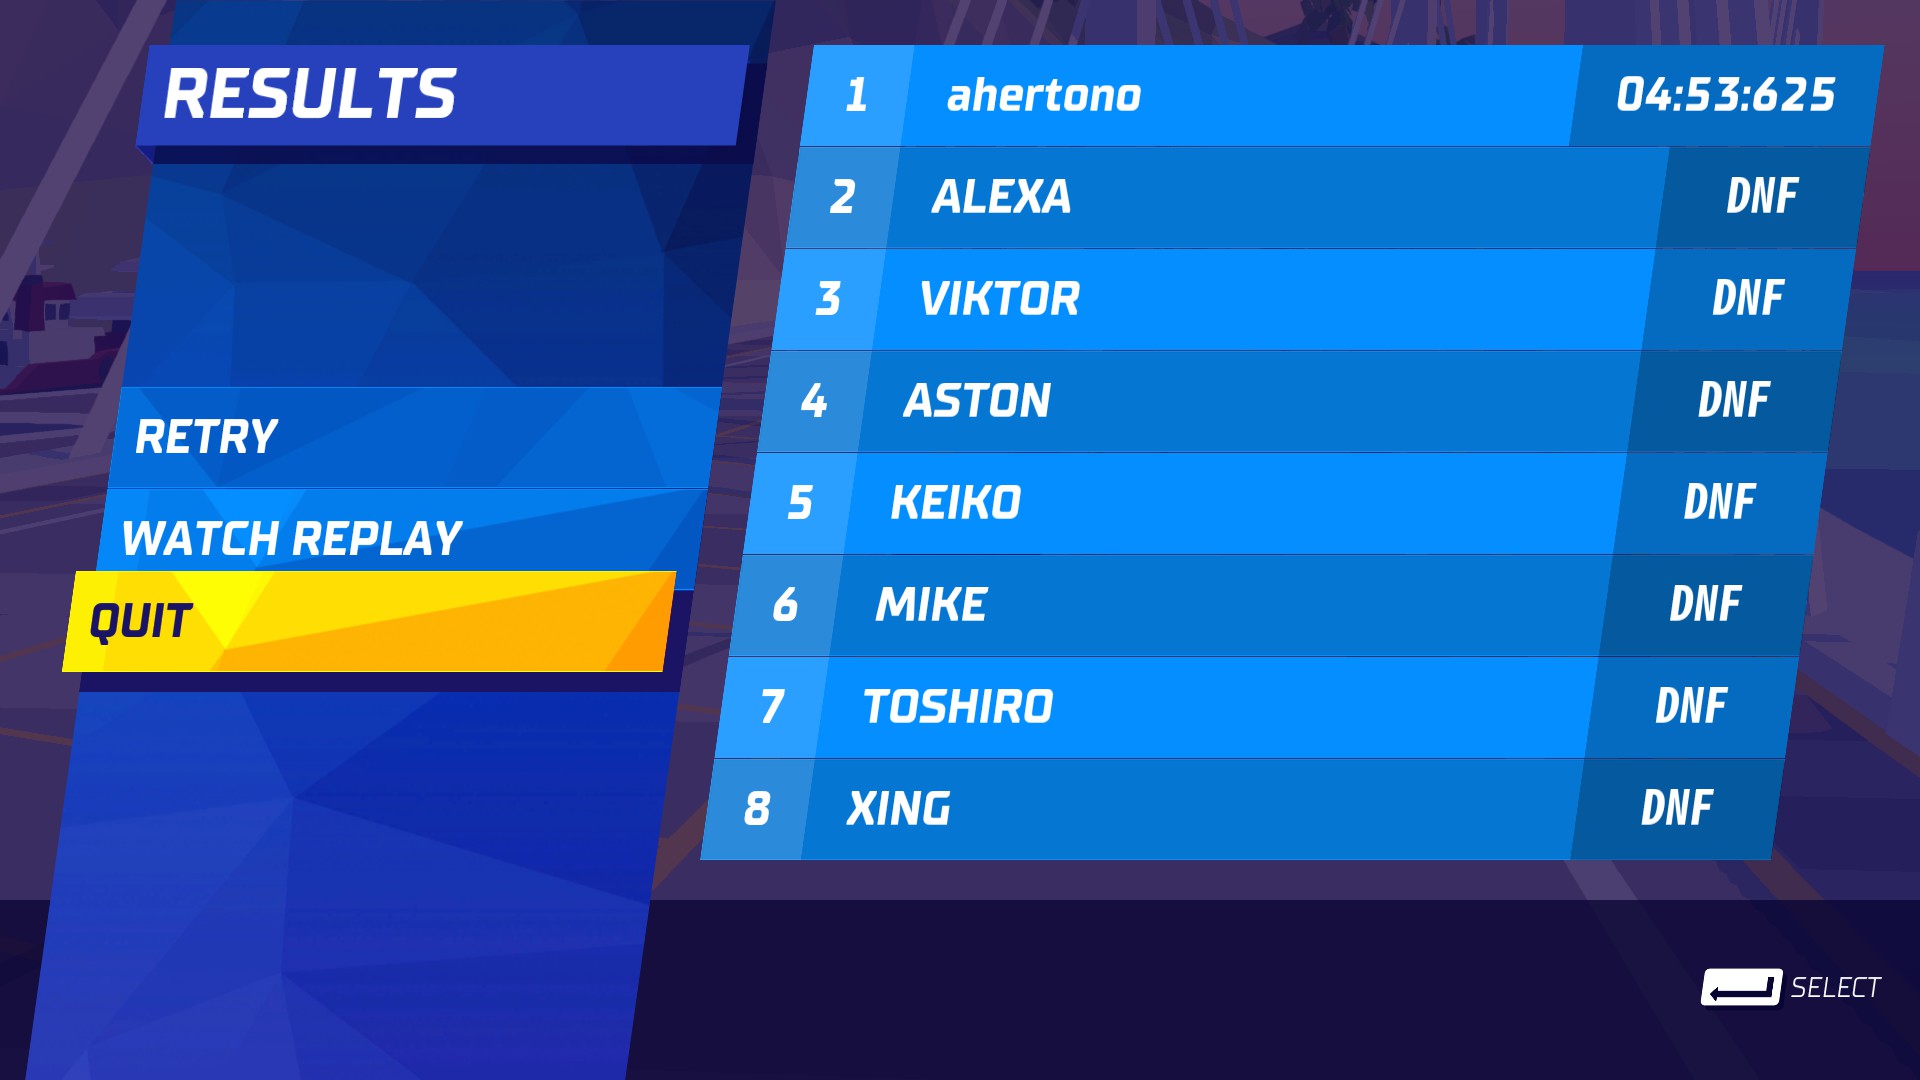
Above, from top: I missed out on a seventh kill by a whisker, but I still got two more kills in the closing laps to bring my total to six - which is still an impressive result.

Any Barrel Barrage in which the same player scores six kills is rare, but this one is noteworthy for how much closer I came to getting seven compared to the previous one. Thankfully, there is no achievement for such a feat, because it's extremely difficult to pull off.


Above: Some of the highlights from this chaotic Barrel Barrage on Sea View in which I scored six kills - and came within a whisker of claiming a seventh.

In short, I didn't expect to do so well in this Barrel Barrage, but I'm lucky and grateful that I did - although I could've done better, but not by much.